
There are a number of reasons this can occur, including enhanced desktop experience, however there are some factors that occur in the most common cases.
- Windows 8, Windows 8.1, Server 2012 or Server 2012 R2 is used
- Xendesktop 7.1 or 7.5 is used
- 8 dot 3 name creation was disabled at the time of installing the VDI
- PVS was used in the image creation process
This problem is normally associated with 8 dot 3 name creation being disabled. The "HKEY_LOCAL_MACHINE\Software\Microsoft\Windows NT\CurrentVersion\Windows\AppInit_DLLs" registry key references mfaphook.dll (or mfaphook64.dll if 64bit) via its 8dot3 name.
In basic terms
No 8dot3 name = mfaphook appinit location pointing to no where = no mfaphook loaded on login = no desktop for the user
Once 8 dot 3 is disabled it can't be re-enabled without significant work, in most cases a re-install of the underlying operating system is going to be quicker and more reliable. This is an annoying fault as many PVS optimization guides list disabling 8 dot 3 name creation as a performance enhancing tweak. However there is a reliable work around.
Before proceeding with the work around, you can do the following test to determine if you have 8 dot 3 name creation disabled.
Dot 3 Name creation disabled - the below workaround may assist
C:\>dir program*. /x
Volume in drive C is DDC1
Directory of C:\
06/05/2012 10:41 AM <DIR> Program Files
06/05/2012 04:49 PM <DIR> Program Files (x86)
Dot 3 Name creation enabled - the below workaround may not assist
C:\>dir program*. /x
Volume in drive C is DDC1
Directory of C:\
06/05/2012 10:41 AM <DIR> PROGRA~1 Program Files
06/05/2012 04:49 PM <DIR> PROGRA~2 Program Files (x86)
The workaround
We noted that the "HKEY_LOCAL_MACHINE\Software\Microsoft\Windows NT\CurrentVersion\Windows\AppInit_DLLs" registry key referenced "C:\Program Files\Citrix\System32\mfaphook64.dll" but via its 8dot3 name "C:\Progra~1\Citrix\System32\mfaphook64.dll".
Initially we tried simply adding "C:\Program Files\Citrix\System32\mfaphook64.dll" to the AppInit_DLLs string, this didn't work.
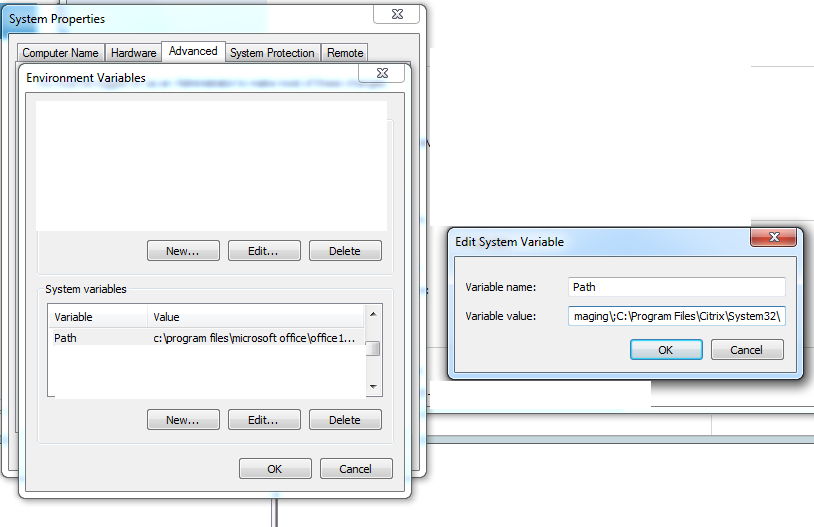
To fix the problem first we added "C:\Program Files\Citrix\System32\" to our systems PATH environmental variable.
1. Open Control Panel, click System
2. Click Advanced system settings
3. Click environmental variables
4. From the Systems variable list, select "Path" and click edit
5. Be sure to leave the existing string, but add the below line to the end of the string. Yes it does need the semicolon.
;C:\Program Files\Citrix\System32\
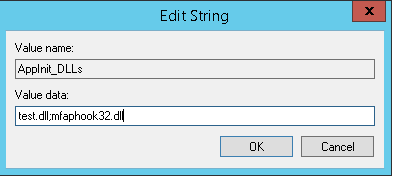
1. Open regedit
2. Go to HKEY_LOCAL_MACHINE\Software\Microsoft\Windows NT\CurrentVersion\Windows
3. Open the AppInit_DLLs key
4. If the key is empty, simply add "mfaphook64.dll" for 64 bit systems or "mfaphook.dll" for 32 bit. Don't include the quotations.
If there is already data in the AppInit_DLLs key, add a ; before the dll. For example ";mfaphook64.dll", again without the quotations.
As we added the directory in the environmental PATH variable we don't need to specify a path in the registry key. When the system looks for mfaphook it will search all the directories in %PATH%.
That should be it, you don't even need to reboot. Your users should now be able to login without a black screen. If they still can't, then I suggest you try to re-install to VDA and disable enhanced desktop experience as mfaphook loading likely isn't your issue.

