You may find yourself in a situation where you have added and removed a piece of hardware from a computer, which then causes you ongoing problems. Unfortunately by default Device Manager often doesn't show these "removed" pieces of hardware, while the solution is very simple it is somewhat hidden from view.
1. Open up a command prompt as Administrator
2. Into the command prompt type,
set devmgr_show_nonpresent_devices=1
3. Then to launch the Device Manager type,
start devmgmt.msc
4. Once Device Manager is open, select the "View" menu and tick "Show Hidden Devices"
5. It is as simple as that, your hidden devices should now appear, giving you a chance to remove them and the drivers that may be causing you issues.

Friday, 30 December 2011


Wednesday, 21 December 2011
Cold Boot Memory Attack part 1
A couple of years back the good folks at Princeton discovered a neat way of attacking full disk encryption. RAM or random access memory is "supposed" to be volatile, meaning as soon as you reboot or power off, the contents is lost. The team at Princeton discovered this certainly isn't the case when the machine is warm rebooted and the contents can even survive a full power off cycle if the RAM temperature is lowered (perhaps with liquid nitrogen).
The technique involves either rebooting the machine with the reset button or pulling the power cable of the rig and attempting to maintain the RAM contents (one way to maintain the contents is to super-cooling the ram). A lightweight operating system is then booted, this OS will only overwrite a small portion of the memory, the remaining memory is then dumped to a file which can later be analysed off-line.
In part 1 I simply want to prove the concept of this attack and learn how it works. Then in part 2 I will attempt to combine what I have previously learnt with liquid nitrogen cooling to see if its possible to transfer the memory from one physical computer to another without losing its contents. This sort of attack might be important if the target doesn't allow selection of boot devices or if there is some other type of boot protection in place.
The Software
I have chosen to use McGrew Security's msramdmp, which in conjunction with the extremely tiny syslinux loader is a lightweight and easy to use memory dumping solution. I will not go into the details of building the bootable USB capable of performing this memory dump as McGrew Security has a great tutorial available here.
I have made a few small modifications to the McGrew Security tutorial though. Instead of using the USB stick to dump the memory contents I am going to use a Corsair Force GT SATA3 SSD. This will allow me to dump the memory contents much quicker, which is essential if you are dumping 4GB+ of memory. I found dumping to USB took in excess of 15minutes for a 2GB module, whereas the SSD took less than a minute to complete. When you are trying to dump data fro liquid nitrogen cooled memory that is slowly decaying, time is of the essence.
The Setup
Gigabyte P55-UD5 with Intel 870
Corsair Force GT SSD (for dumping the memory)
USB configured with syslinux 3.6 and msramdmp
2GB module of GSKILL PSC memory

I have chosen a single 2GB stick of PSC as the lower memory size will dump quicker. I have selected PSC because it likes cold temperatures, so when it comes time to freeze the memory I know this stick will work perfectly.

The Attack
First I prepare my SSD with the type 40 partition (Venix 80286) required to dump the memory (as per the image below).

I then booted into an USB based dos boot disk and tried to seed my blog name into the memory. I have repeated this a number of times but every time when I boot into Linux to analyse the dump, there is no mention of metasplo.it.

Next I tried booting into a Linux live USB and did the same echo command, but this time the output is sent to a file situated on a "ramdisk" in the hope this will help seed my blog address into RAM.

Next I warm reboot the machine by hitting the reset button, I hit F12 and selected to boot from my msramdmp USB and let the dump occur.

After around a minute the 2GB of memory is written to the type 40 partition on my SSD and then msramdmp changes the partition to type 41 (PPC PReP Boot) as per below.

Next I rebooted into the Linux live CD once again to analyse the SSD with the strings command. SUCCESS! This time the "blog.metasplo.it" string has survived the reboot and been dumped successfully from memory.

That was relatively easy and the end of part 1. You can see how this attack could be brutal in dumping encryption keys to even the most heavily encrypted hard disk.
Next I will try to transfer the memory module from one system to another while frozen with liquid nitrogen to proof of concept an attack in a more privileged environment.
The technique involves either rebooting the machine with the reset button or pulling the power cable of the rig and attempting to maintain the RAM contents (one way to maintain the contents is to super-cooling the ram). A lightweight operating system is then booted, this OS will only overwrite a small portion of the memory, the remaining memory is then dumped to a file which can later be analysed off-line.
In part 1 I simply want to prove the concept of this attack and learn how it works. Then in part 2 I will attempt to combine what I have previously learnt with liquid nitrogen cooling to see if its possible to transfer the memory from one physical computer to another without losing its contents. This sort of attack might be important if the target doesn't allow selection of boot devices or if there is some other type of boot protection in place.
The Software
I have chosen to use McGrew Security's msramdmp, which in conjunction with the extremely tiny syslinux loader is a lightweight and easy to use memory dumping solution. I will not go into the details of building the bootable USB capable of performing this memory dump as McGrew Security has a great tutorial available here.
I have made a few small modifications to the McGrew Security tutorial though. Instead of using the USB stick to dump the memory contents I am going to use a Corsair Force GT SATA3 SSD. This will allow me to dump the memory contents much quicker, which is essential if you are dumping 4GB+ of memory. I found dumping to USB took in excess of 15minutes for a 2GB module, whereas the SSD took less than a minute to complete. When you are trying to dump data fro liquid nitrogen cooled memory that is slowly decaying, time is of the essence.
The Setup
Gigabyte P55-UD5 with Intel 870
Corsair Force GT SSD (for dumping the memory)
USB configured with syslinux 3.6 and msramdmp
2GB module of GSKILL PSC memory

I have chosen a single 2GB stick of PSC as the lower memory size will dump quicker. I have selected PSC because it likes cold temperatures, so when it comes time to freeze the memory I know this stick will work perfectly.

The Attack
First I prepare my SSD with the type 40 partition (Venix 80286) required to dump the memory (as per the image below).

I then booted into an USB based dos boot disk and tried to seed my blog name into the memory. I have repeated this a number of times but every time when I boot into Linux to analyse the dump, there is no mention of metasplo.it.

Next I tried booting into a Linux live USB and did the same echo command, but this time the output is sent to a file situated on a "ramdisk" in the hope this will help seed my blog address into RAM.
Next I warm reboot the machine by hitting the reset button, I hit F12 and selected to boot from my msramdmp USB and let the dump occur.

After around a minute the 2GB of memory is written to the type 40 partition on my SSD and then msramdmp changes the partition to type 41 (PPC PReP Boot) as per below.

Next I rebooted into the Linux live CD once again to analyse the SSD with the strings command. SUCCESS! This time the "blog.metasplo.it" string has survived the reboot and been dumped successfully from memory.

That was relatively easy and the end of part 1. You can see how this attack could be brutal in dumping encryption keys to even the most heavily encrypted hard disk.
Next I will try to transfer the memory module from one system to another while frozen with liquid nitrogen to proof of concept an attack in a more privileged environment.
Monday, 19 December 2011
Deploying Adobe Premiere Elements 10 in a network environment
Adobe Premiere is an essential tool in an educational environment, especially one with a huge recent spike in video usage like ours. I was recently lucky enough to receive a number of Adobe Premiere Elements 10 (PE10) licenses to deploy throughout my network.
I know Adobe products are always horrible to deploy, but PE10 takes something bad to a whole new level.
The Problem
Unfortunately PE10 seems to have a serious incomparability with network based profile directories, like the ones most schools would be using. The product installs without issue, but when you get to the "New Project" screen the "Save In:" field is blank. Once you click "browse" to find a path to save your project, PE10 complains of a serious error and then crashes.

The exact error message is "Sorry, a serious error has occured that requires Adobe Premiere Elements to shut down. We will attempt to save your current project."
If I login to a local account (with no network based profile, obviously) everything works perfectly.
As per this thread it seems Adobe's official position is that PE10 is designed to be used locally and running it in a network environment is unsupported. This is once again a failure by Adobe in the deployment space, it seems they just can't understand we just want to "install.exe /s" their products, what is so hard about that? I don't want to learn a whole new language to deploy a product and then have to put together dodgy fixes to get it working. OK, rant over!
The Solution
There are a few parts to this solution but the core of the fix revolves around a file called "Adobe Premiere Elements Prefs" that sits in "%appdata%\Adobe\Premiere Elements\10.0". This file contains a number of user based preferences, including the paths.
The specific line in the configuration we want to set is as below. This is the line that's populated in the "Save in:" box that is giving us all the problems.
1. Log into a computer with PE10 installed as a local administrator.
2. Create a local folder, ensure all users have permission to read/write. I have created a folder called c:\pe10scratch and given the "Users" group permissions to this folder.
3. Launch PE10.
4. Save your "New Project" in the c:\pe10scatch folder. (You must do this)
5. It is also a good idea to go to change the paths of all scratch disks to local disks. If network paths are used this can mean massive amounts of data moving across the network and slow performance for the user. Once in PE10 select the "Edit" menu, select "Preferences" and select "scratch disks". Set a local path for all of the available option.

6. Close PE10.
Now we need to grab the "%appdata%\Adobe\Premiere Elements\10.0\Adobe Premiere Elements Prefs" file and all of the files in the c:\pe10scratch folder (or whatever you may have called it).
At this point you may also like to grab some of the registry settings from "HKEY_CURRENT_USER\Software\Adobe". Some of the interesting ones that might save your users time are:
These specific registry settings and possibly some others, can be deployed on login to ensure your users don't see annoying "feedback program" and "your VGA driver isn't up to date" type messages when launching the program.
User Based Settings Deployment
Now that you have your registry settings, preferences and the empty project we need to deploy them somehow.
For the registry settings and the preferences file I am using my existing kixtart based login script. A simple script as below will do the job. The following script deploys the HKCU registry changes and the preferences file if PE10 is installed on the machine.
Deploying PE10 and the empty project
I won't cover the actual silent deployment process because Adobe has a good write up available here (yes I just did compliment Adobe for once)
I have chosen to deploy the C:\pe10scratch folder and the empty project as part of my SCCM deployment of PE10. My deployment batch file reads as follows:
Please Adobe, think about your end users before releasing a product that requires dodgy fixes to work.
I know Adobe products are always horrible to deploy, but PE10 takes something bad to a whole new level.
The Problem
Unfortunately PE10 seems to have a serious incomparability with network based profile directories, like the ones most schools would be using. The product installs without issue, but when you get to the "New Project" screen the "Save In:" field is blank. Once you click "browse" to find a path to save your project, PE10 complains of a serious error and then crashes.

The exact error message is "Sorry, a serious error has occured that requires Adobe Premiere Elements to shut down. We will attempt to save your current project."
If I login to a local account (with no network based profile, obviously) everything works perfectly.
As per this thread it seems Adobe's official position is that PE10 is designed to be used locally and running it in a network environment is unsupported. This is once again a failure by Adobe in the deployment space, it seems they just can't understand we just want to "install.exe /s" their products, what is so hard about that? I don't want to learn a whole new language to deploy a product and then have to put together dodgy fixes to get it working. OK, rant over!
The Solution
There are a few parts to this solution but the core of the fix revolves around a file called "Adobe Premiere Elements Prefs" that sits in "%appdata%\Adobe\Premiere Elements\10.0". This file contains a number of user based preferences, including the paths.
The specific line in the configuration we want to set is as below. This is the line that's populated in the "Save in:" box that is giving us all the problems.
Instead of creating this file by hand we are going to do a little bit of Adobe hacking.<BE.Prefs.MRU.Document.0></BE.Prefs.MRU.Document.0>
1. Log into a computer with PE10 installed as a local administrator.
2. Create a local folder, ensure all users have permission to read/write. I have created a folder called c:\pe10scratch and given the "Users" group permissions to this folder.
3. Launch PE10.
4. Save your "New Project" in the c:\pe10scatch folder. (You must do this)
5. It is also a good idea to go to change the paths of all scratch disks to local disks. If network paths are used this can mean massive amounts of data moving across the network and slow performance for the user. Once in PE10 select the "Edit" menu, select "Preferences" and select "scratch disks". Set a local path for all of the available option.

6. Close PE10.
Now we need to grab the "%appdata%\Adobe\Premiere Elements\10.0\Adobe Premiere Elements Prefs" file and all of the files in the c:\pe10scratch folder (or whatever you may have called it).
At this point you may also like to grab some of the registry settings from "HKEY_CURRENT_USER\Software\Adobe". Some of the interesting ones that might save your users time are:
[HKEY_CURRENT_USER\Software\Adobe\Elements Organizer\10.0]
"Locale"=
[HKEY_CURRENT_USER\Software\Adobe\Premiere Elements\10.0]
"Language"="
"ShowDriverUpdateMsg"=
"DriverUpdateMsgCount"=
[HKEY_CURRENT_USER\Software\Adobe\Premiere Elements\10.0\WelcomeScreen]
"QuickLaunchApp"=
"QuickLaunchApp"=
"LaunchCount"=
[HKEY_CURRENT_USER\Software\Adobe\CommonFiles\Usage\Elements10]
"OptIn"=
"OptIn"=
"Date"=
These specific registry settings and possibly some others, can be deployed on login to ensure your users don't see annoying "feedback program" and "your VGA driver isn't up to date" type messages when launching the program.
User Based Settings Deployment
Now that you have your registry settings, preferences and the empty project we need to deploy them somehow.
For the registry settings and the preferences file I am using my existing kixtart based login script. A simple script as below will do the job. The following script deploys the HKCU registry changes and the preferences file if PE10 is installed on the machine.
;setup premiere elements 10That is one piece of the puzzle, the other is deploying the empty project we created in step 4. Unfortunately unless this project exists on the target system, the "Save In:" box will still be empty and crash when you click browse.
if (exist("%programfiles%\Adobe\Adobe Premiere Elements 10")) and (exist("%appdata%\premel10.tch")=0)
SHELL "regedit /s $logonpath\registry\premel10\premel10.reg"
SHELL '%COMSPEC% /C xcopy "$logonpath\registry\premel10\Adobe Premiere Elements Prefs" "%appdata%\Adobe\Premiere Elements\10.0\" /E /Y /C'
Copy ("$logonpath\generic.tch") ("%appdata%\premel10.tch") /H
endif
Deploying PE10 and the empty project
I won't cover the actual silent deployment process because Adobe has a good write up available here (yes I just did compliment Adobe for once)
I have chosen to deploy the C:\pe10scratch folder and the empty project as part of my SCCM deployment of PE10. My deployment batch file reads as follows:
vcredist_x86.exe /QExtremely simply but effective. You may also choose to deploy HKLM registry settings at the same time.
start /wait oem.exe /UL1033 /V"SERIALNUMBER=1111-1111-1111-1111-1111-1111"
xcopy "custom\elements" "c:\pe10scratch" /E /Y /C
Please Adobe, think about your end users before releasing a product that requires dodgy fixes to work.
Friday, 16 December 2011
Sequencing Adobe Premiere Elements 10 with App-V 4.6 SP1
I recently received a number of licenses for premiere elements 10 and due to licensing restrictions decided the best way to move forward would be to use App-V for license management.
I began the package sequencing and towards the end of the installation I recieved an error message when the "Shared Technologies" were installing.

After this installation failure, the Adobe installer kindly begins rolling back the rest of the installation, resulting in a sequencing failure.
The Resolution
This one is extremely easy but took some digging with procmon and working through logs to work it out. The installer is looking for Visual C++ 2008 SP1 x86 and as my sequencing machine didn't have it, the sequencing failed.
Specifically you need version 9.0.30729.17, without this specific version the installation won't proceed. You need to perform this installation BEFORE you start your sequencing and the package must also be installed on any App-V clients that will be accessing the application. If you miss any of these steps the application wont sequence or wont launch.
Microsoft Visual C++ 2008 SP1 x86 is available here
If you require additional information on the silent installation process itself, please check out the Adobe website http://kb2.adobe.com/cps/922/cpsid_92294.html
Tuesday, 13 December 2011
Blocking Windows XP user group policy by exploiting a roaming profile vulnerability
For users that roam from workstation to workstation, roaming profiles can be a life saver. All the users settings and customizations move with them and save bucket loads of configuration.
There is a huge security hole with the Windows XP roaming profile model thought, as the HKEY_CURRENT_USER hive is synchronized to the network, any customizations to the security permissions are also synchronized. It is therefore possible to totally block group policies from applying at the HKEY_CURRENT_USER level with a few easy steps.
While this doesn't affect computer level policies in the same way, they are rarely used to enforce restrictions such as blocking regedit, command prompt or the run command. Incidentally a user in a high security environment can bypass these restrictions throughout the whole network by access a single vulnerable machine.
The following steps must be performed as a local Administrator. Hold on, did you say as an Administrator? Doesn't that ruin the whole security hole arguement? In fact there are so many vulnerabilities in Windows XP that unless the patch management of the environment is good, you should be able to elevate to Administrator or SYSTEM on some computer throughout the enviroment.
Even easier is to use the "vBootkit" by Nitin and Vipin Kumar. This ingenious boot CD allows the attacker to elevate any process to system level privileges by loading a temporary rootkit into the MBT. For example we could designate the vBootkit to elevate cmd.exe to SYSTEM token after we launch it, or if command prompt is currently blocked with policy we could elevate a 3rd party task manager or launcher.
The beauty of the vBootkit is as soon as you reboot, its gone, it only loads itself into the memory space of the single boot.
Could it get any easier?
1. After elevating yourself to an Administrator or SYSTEM prompt (perhaps via the Kumar's vBootKit), launch a regedit session.

2. After I navigate to my "HKEY_CURRENT_USER\Software\Policies" key, you can see a number of policies that are set to apply to my account. These have likely been added via domain group policy.

3. If we right click the Policies key and select permissions, we find the SYSTEM has full control over this key.

5. The SYSTEM account is used to deliver group policies directly to this "HKEY_CURRENT_USER\Software\Policies" registry key. By setting the SYSTEM account to Deny permissions. as per the image below, we effectively block the system from being able to apply its group policies to my account.
Computer policies will still continue to function, but you can use the same technique on the "HKEY_LOCAL_MACHINE\Software\Policies" hive to block computer policies. The difference is HKLM changes won't follow you from computer to computer like HKCU policies will in a roaming profile environment.

6. The next step is to delete all the existing policies (unless there is any you want to keep of course). We can now potentially unblock Internet Explorer restrictions, allow the command prompt and perhaps even stop a login script from running.

7. Now if you run a gpupdate you will find the policies don't reapply, your HKCU policy free! The next time you log off these policy permission changes will be synchronized to the network and you will be exempt from HKCU policies on every machine login.

You can see how devastating this could potentially be. A systems administrator doesn't patch an edge workstations as early as early as he or she should, an employee elevates themselves to local administrator and applies these group policy blocks, the changes synchronize to the network. All of a sudden that same employee has allot more flexibility to launch attacks from more privileged workstations (that are running roaming profiles) in other parts of the network.
Possible ways of mitigating the attack
I think the easiest way to mitigate the attack is auditing. Regular checking, or scripted checking of NTUSER.DAT hives on the network share the roaming profiles reside.
I have played around with scripting to mount the hive as read-only (with reg load), check the Policies key for SYSTEM permissions irregularities with subinacl, report on any unusual findings and then un-mount the hive.
Using subinacl and the below string we can audit the current status of the SYSTEM account that is used to apply the group policy to the user "HKEY_CURRENT_USER\Software\Policies" key.
subinacl /verbose=1 /keyreg "HKEY_CURRENT_USER\Software\Policies" /display=dacl

You could very simply do this with a batch or kixtart script and have it run on a weekly or monthly basis and e-mail the dodgy findings directly to you.
There is a huge security hole with the Windows XP roaming profile model thought, as the HKEY_CURRENT_USER hive is synchronized to the network, any customizations to the security permissions are also synchronized. It is therefore possible to totally block group policies from applying at the HKEY_CURRENT_USER level with a few easy steps.
While this doesn't affect computer level policies in the same way, they are rarely used to enforce restrictions such as blocking regedit, command prompt or the run command. Incidentally a user in a high security environment can bypass these restrictions throughout the whole network by access a single vulnerable machine.
The following steps must be performed as a local Administrator. Hold on, did you say as an Administrator? Doesn't that ruin the whole security hole arguement? In fact there are so many vulnerabilities in Windows XP that unless the patch management of the environment is good, you should be able to elevate to Administrator or SYSTEM on some computer throughout the enviroment.
Even easier is to use the "vBootkit" by Nitin and Vipin Kumar. This ingenious boot CD allows the attacker to elevate any process to system level privileges by loading a temporary rootkit into the MBT. For example we could designate the vBootkit to elevate cmd.exe to SYSTEM token after we launch it, or if command prompt is currently blocked with policy we could elevate a 3rd party task manager or launcher.
The beauty of the vBootkit is as soon as you reboot, its gone, it only loads itself into the memory space of the single boot.
Could it get any easier?
1. After elevating yourself to an Administrator or SYSTEM prompt (perhaps via the Kumar's vBootKit), launch a regedit session.

2. After I navigate to my "HKEY_CURRENT_USER\Software\Policies" key, you can see a number of policies that are set to apply to my account. These have likely been added via domain group policy.
3. If we right click the Policies key and select permissions, we find the SYSTEM has full control over this key.

5. The SYSTEM account is used to deliver group policies directly to this "HKEY_CURRENT_USER\Software\Policies" registry key. By setting the SYSTEM account to Deny permissions. as per the image below, we effectively block the system from being able to apply its group policies to my account.
Computer policies will still continue to function, but you can use the same technique on the "HKEY_LOCAL_MACHINE\Software\Policies" hive to block computer policies. The difference is HKLM changes won't follow you from computer to computer like HKCU policies will in a roaming profile environment.

6. The next step is to delete all the existing policies (unless there is any you want to keep of course). We can now potentially unblock Internet Explorer restrictions, allow the command prompt and perhaps even stop a login script from running.
7. Now if you run a gpupdate you will find the policies don't reapply, your HKCU policy free! The next time you log off these policy permission changes will be synchronized to the network and you will be exempt from HKCU policies on every machine login.

You can see how devastating this could potentially be. A systems administrator doesn't patch an edge workstations as early as early as he or she should, an employee elevates themselves to local administrator and applies these group policy blocks, the changes synchronize to the network. All of a sudden that same employee has allot more flexibility to launch attacks from more privileged workstations (that are running roaming profiles) in other parts of the network.
Possible ways of mitigating the attack
I think the easiest way to mitigate the attack is auditing. Regular checking, or scripted checking of NTUSER.DAT hives on the network share the roaming profiles reside.
I have played around with scripting to mount the hive as read-only (with reg load), check the Policies key for SYSTEM permissions irregularities with subinacl, report on any unusual findings and then un-mount the hive.
Using subinacl and the below string we can audit the current status of the SYSTEM account that is used to apply the group policy to the user "HKEY_CURRENT_USER\Software\Policies" key.
subinacl /verbose=1 /keyreg "HKEY_CURRENT_USER\Software\Policies" /display=dacl

You could very simply do this with a batch or kixtart script and have it run on a weekly or monthly basis and e-mail the dodgy findings directly to you.
Friday, 2 December 2011
Deploying custom Microsoft Word 2007 registry settings at logon
As a systems administrator in a reception to 12 school (K to 12 for any non-aussie's reading) I get allot of requests for settings delivery, much more than I ever experienced in the corporate world. These settings range from printers, network drives to office templates, application configuration and anything else you can think of.
Recently I was asked to deliver some Microsoft Word 2007 settings for our younger students, the requests from staff were that the "picture in front of text", "hide formatting" and "search everywhere in clipart" options were automatically deployed. For students as young as 5 logging onto the computer and opening Word can be a challenge, let alone going into options and manually configuring these options.
All of these settings are buried deep in Office 2007's registry entries but with some trial and error and the ever trusty procmon from sysinternals, it is easy to work out.
Setting clipart to search web collections
This one is fairly easy, the key in question is:
The easiest way to get the setting you want is to open Word, tick the appropriate boxes and then export the above key with regedit.

Applying the setting is as simple as importing it into the users HKCU store as part of your login script, below is an example of a kixtart script.
if ($isUserReception)
SHELL "regedit /s $logonpath\registry\word2007pictureinfront_hideformat.reg"
SHELL "regedit /s $logonpath\registry\word2007clipartcollections.reg"
endif
Keeping picture in front of text and hiding formatting
Changing these two settings are slightly more difficult but can be extracted in exactly the same way. Both of these settings are controlled by a large value named:
[HKEY_CURRENT_USER\Software\Microsoft\Office\12.0\Word\Data\Settings]
This REG_BINARY value is unconfigured by default and is only set when the user specifies some non-default settings in Word, such as the "keep picture in front of text" and "hide formatting" from the options menu.
1. Before we try to capture the settings it is best to start wish a fresh [HKEY_CURRENT_USER\Software\Microsoft\Office\12.0\Word\Data\Settings] value, you can do this by deleting the value in regedit.
2. Next open Word 2007 and set your options. For me those options are "keep picture in front of text" and "hide formatting" but you can set as many settings as you want. You may need to do this multiple times for multiple settings "packages" as its not possible to export individual settings as most are contained within this single value.

3. Close Word, this is when the settings are written to the registry.
4. You can now export the key and deploy it with a logon script. Remember this is a HKCU key, so it must be deployed in a user based script.
Hopefully these couple easy processes will help you deploy more advanced settings for your users.
Recently I was asked to deliver some Microsoft Word 2007 settings for our younger students, the requests from staff were that the "picture in front of text", "hide formatting" and "search everywhere in clipart" options were automatically deployed. For students as young as 5 logging onto the computer and opening Word can be a challenge, let alone going into options and manually configuring these options.
All of these settings are buried deep in Office 2007's registry entries but with some trial and error and the ever trusty procmon from sysinternals, it is easy to work out.
Setting clipart to search web collections
This one is fairly easy, the key in question is:
[HKEY_CURRENT_USER\Software\Microsoft\Office\12.0\Clip Organizer\Search\Last Query\Extra]
The easiest way to get the setting you want is to open Word, tick the appropriate boxes and then export the above key with regedit.
Applying the setting is as simple as importing it into the users HKCU store as part of your login script, below is an example of a kixtart script.
if ($isUserReception)
SHELL "regedit /s $logonpath\registry\word2007pictureinfront_hideformat.reg"
SHELL "regedit /s $logonpath\registry\word2007clipartcollections.reg"
endif
Keeping picture in front of text and hiding formatting
Changing these two settings are slightly more difficult but can be extracted in exactly the same way. Both of these settings are controlled by a large value named:
[HKEY_CURRENT_USER\Software\Microsoft\Office\12.0\Word\Data\Settings]
This REG_BINARY value is unconfigured by default and is only set when the user specifies some non-default settings in Word, such as the "keep picture in front of text" and "hide formatting" from the options menu.
1. Before we try to capture the settings it is best to start wish a fresh [HKEY_CURRENT_USER\Software\Microsoft\Office\12.0\Word\Data\Settings] value, you can do this by deleting the value in regedit.
2. Next open Word 2007 and set your options. For me those options are "keep picture in front of text" and "hide formatting" but you can set as many settings as you want. You may need to do this multiple times for multiple settings "packages" as its not possible to export individual settings as most are contained within this single value.
3. Close Word, this is when the settings are written to the registry.
4. You can now export the key and deploy it with a logon script. Remember this is a HKCU key, so it must be deployed in a user based script.
Hopefully these couple easy processes will help you deploy more advanced settings for your users.
Monday, 28 November 2011
Integrating Lync 2010 and Asterisk
Lync 2010 is a great product and can stand on its own to deliver a good PABX system for the education or business sectors. Where Lync falls down is flexibility, tying in 3rd party scripts, connectivity with products like Skype and even voice based menus. Fortunately we can easily route calls between Asterisk and Lync to produce a much more flexible outcome.
I am a massive fan of Asterisk and have used it numerous times in the past for both my home PABX and several businesses I previously supported. Asterisk is not the easiest product for the end user to connect to, a strength that Lync defiantly has.
In my environment I am using an Asterisk box with advanced scripting based dial plans to handle the incoming PSTN to SIP traffic.
The Integration Process
Obviously you need a working Lync and Asterisk installation before you can begin the process. I'm not going into the Asterisk/Lync server setup process in this tutorial but AsteriskNOW is a great place to start if you want an easy to install Asterisk product. I recommend installing the command line variant and not using the limiting AsteriskGUI, it's harder to learn but also gives you many more possibilities.
1. First we need to configure the SIP trunk in Asterisk's sip.conf. Open /etc/asterisk/sip.conf in your favourite Linux editor and add the following text to the end of the file.
The host= variable needs to reflect your Lync front end, for example my front end IP address is 192.168.1.10. Then save and close the file.
2. Next we are going to add an entry to our /etc/asterisk/extensions.conf file to give us an extension we can call from Lync as a test. Open /etc/asterisk/extensions.conf and add the following text to the end of the file.
Save and close the file. This 9999 extensions will allow us to do a simple echo test, the [fromlync] header is important as this is the context that our sip.conf entry refers to in step 1.
3. Issue the reload command from the Linux command line, this will force Asterisk to load the above changes.
4. Now we can move onto the Lync side, jump on your Lync server and fire up the the topology builder. "Download the latest toplogy from existing deployment" and then jump straight to the "PSTN Gateway" section.
5. As far as Lync is concerned, Asterisk is a PSTN gateway, so right click PSTN Gateways and click "New IP/PSTN Gateway..."

6. On the "Define New IP/PSTN Gateway" screen we need to specify the settings for our Asterisk box. You will need to enter the IP Address, set 5060 as the port and select TCP as the SIP transport protocol as per the image below.

7. To publish the topology changes we have just made, right click on the Lync Server 2010 menu option and select "Publish Toplogy...". After a few seconds these topology changes should be complete, but it can take some time for them to propagate to the Lync server.
8. Now our SIP trunk is in place, Lync needs a dial-plan and associated routes so it knows what numbers it should route to our new Asterisk trunk. We will start by adding a dial plan entry, open the Lync Control Panel and click on the "Voice Routing" option, then select "Dial Plan"
9. Click on the "Global" entry, then select "edit" and "show details".

10. Under the "Associated Normalization Rules" select "New" to add a new rule.
11. You can call the rule anything you want, for the other settings:

12. You now need to commit the changes. Click "Commit" and then select "Commit all", on the following page click "Commit" again.

13. Now we need to define a "Voice Policy" to forward any 9XXX dialled numbers in Lync to Asterisk. To do this select "Voice Routing" from the left hand side menu and then select "Voice Policy".
14. Again we need to select the "Global" rule, click "edit" and "show details".
15. Under the "Associated PSTN Usages" select "New" to add a new rule.
16. Give your rule a name and then click "New" to add a new route.

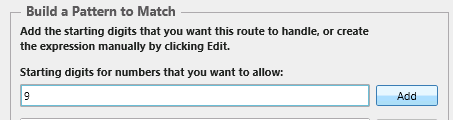
17. On the "New Route" screen, give your route a name and then and the in the "Build a Pattern to Match" section add 9 into the box and select "add". This is an extremely board match, but you can tighten it up later it you want.

18. Then move down to the "Associated gateways" box and add the PSTN gateway we earlier added to our topology builder. Click "OK" in the top left hand corner to accept the route. Then "OK" again on the "New PSTN Usage Record" screen to accept. Finally click "OK" on the Edit Voice Policy screen to accept your new route entry.

19. Again we must commit the changes by selecting "Commit" and clicking "Commit all", then click "Commit" on the following screen.
20. The last piece of the configuration puzzle is to go to the "Voice Routing" options tab from the left hand menu, select "Route" from the top menu. and commit these changes. To commit the changes select "Commit" and click "Commit all", then click "Commit" on the following screen.
Now for the fun part
The dreaded configuration is out of the way, now lets test it out. If things don't work immediately please wait 15 minutes and try again, Lync can take some time to propagate changes.
Before we attempt the call it is a good idea to open an asterisk console by SSH'ing into the Asterisk box and typing asterisk -cr on the command line. This will allow you to want the traffic coming in from Lync to Asterisk and how the dial plans are accessed in real time.

1. Open your Lync client and dial 9999
2. If you opened the Asterisk console you will see the call passed from Lync to Asterisk and the dial plan take effect. You should hear the echo test begin though your Lync connected head set or phone.
I have blanked out some of the sensitive information but here is an example of what you should see on the Asterisk console (click to enlarge).

Congratulations! You now have a Asterisk/Lync monster that you can manipulate however you want. Of course if you want calls to go in the other direction you can use a dial plan entry such as Dial(SIP/1000@lynctrunk,35,tr) in your Asterisk extensions.conf to call SIP extension 1000 on your Lync box.
Some troubleshooting tips
I am a massive fan of Asterisk and have used it numerous times in the past for both my home PABX and several businesses I previously supported. Asterisk is not the easiest product for the end user to connect to, a strength that Lync defiantly has.
In my environment I am using an Asterisk box with advanced scripting based dial plans to handle the incoming PSTN to SIP traffic.
The Integration Process
Obviously you need a working Lync and Asterisk installation before you can begin the process. I'm not going into the Asterisk/Lync server setup process in this tutorial but AsteriskNOW is a great place to start if you want an easy to install Asterisk product. I recommend installing the command line variant and not using the limiting AsteriskGUI, it's harder to learn but also gives you many more possibilities.
1. First we need to configure the SIP trunk in Asterisk's sip.conf. Open /etc/asterisk/sip.conf in your favourite Linux editor and add the following text to the end of the file.
[lynctrunk]
type=friend
port=5068
host=192.168.1.10
dtmfmode=rfc2833
context=fromlync
qualify=yes
transport=tcp,udp
The host= variable needs to reflect your Lync front end, for example my front end IP address is 192.168.1.10. Then save and close the file.
2. Next we are going to add an entry to our /etc/asterisk/extensions.conf file to give us an extension we can call from Lync as a test. Open /etc/asterisk/extensions.conf and add the following text to the end of the file.
[fromlync]
;echo test
exten=>9999,1,Answer()
exten=>9999,2,Playback(en/demo-echotest)
exten=>9999,n,Echo
exten=>9999,n,Playback(en/demo-echodone)
exten=>9999,n(eof),Hangup()
Save and close the file. This 9999 extensions will allow us to do a simple echo test, the [fromlync] header is important as this is the context that our sip.conf entry refers to in step 1.
3. Issue the reload command from the Linux command line, this will force Asterisk to load the above changes.
asterisk -rx "reload"
4. Now we can move onto the Lync side, jump on your Lync server and fire up the the topology builder. "Download the latest toplogy from existing deployment" and then jump straight to the "PSTN Gateway" section.
5. As far as Lync is concerned, Asterisk is a PSTN gateway, so right click PSTN Gateways and click "New IP/PSTN Gateway..."

6. On the "Define New IP/PSTN Gateway" screen we need to specify the settings for our Asterisk box. You will need to enter the IP Address, set 5060 as the port and select TCP as the SIP transport protocol as per the image below.

7. To publish the topology changes we have just made, right click on the Lync Server 2010 menu option and select "Publish Toplogy...". After a few seconds these topology changes should be complete, but it can take some time for them to propagate to the Lync server.
8. Now our SIP trunk is in place, Lync needs a dial-plan and associated routes so it knows what numbers it should route to our new Asterisk trunk. We will start by adding a dial plan entry, open the Lync Control Panel and click on the "Voice Routing" option, then select "Dial Plan"
9. Click on the "Global" entry, then select "edit" and "show details".
10. Under the "Associated Normalization Rules" select "New" to add a new rule.
11. You can call the rule anything you want, for the other settings:
"Starting digits" field put "9"
"Length:" field select "Exactly" and "4"
"Digits to remove:" field select "0"
"Digits to add:" field remove the "+" to leave the field blank
You can copy my settings as per the example photo below, then click "OK"
12. You now need to commit the changes. Click "Commit" and then select "Commit all", on the following page click "Commit" again.
13. Now we need to define a "Voice Policy" to forward any 9XXX dialled numbers in Lync to Asterisk. To do this select "Voice Routing" from the left hand side menu and then select "Voice Policy".
14. Again we need to select the "Global" rule, click "edit" and "show details".
15. Under the "Associated PSTN Usages" select "New" to add a new rule.
16. Give your rule a name and then click "New" to add a new route.

17. On the "New Route" screen, give your route a name and then and the in the "Build a Pattern to Match" section add 9 into the box and select "add". This is an extremely board match, but you can tighten it up later it you want.
18. Then move down to the "Associated gateways" box and add the PSTN gateway we earlier added to our topology builder. Click "OK" in the top left hand corner to accept the route. Then "OK" again on the "New PSTN Usage Record" screen to accept. Finally click "OK" on the Edit Voice Policy screen to accept your new route entry.

19. Again we must commit the changes by selecting "Commit" and clicking "Commit all", then click "Commit" on the following screen.
20. The last piece of the configuration puzzle is to go to the "Voice Routing" options tab from the left hand menu, select "Route" from the top menu. and commit these changes. To commit the changes select "Commit" and click "Commit all", then click "Commit" on the following screen.
Now for the fun part
The dreaded configuration is out of the way, now lets test it out. If things don't work immediately please wait 15 minutes and try again, Lync can take some time to propagate changes.
Before we attempt the call it is a good idea to open an asterisk console by SSH'ing into the Asterisk box and typing asterisk -cr on the command line. This will allow you to want the traffic coming in from Lync to Asterisk and how the dial plans are accessed in real time.
2. If you opened the Asterisk console you will see the call passed from Lync to Asterisk and the dial plan take effect. You should hear the echo test begin though your Lync connected head set or phone.
I have blanked out some of the sensitive information but here is an example of what you should see on the Asterisk console (click to enlarge).

Congratulations! You now have a Asterisk/Lync monster that you can manipulate however you want. Of course if you want calls to go in the other direction you can use a dial plan entry such as Dial(SIP/1000@lynctrunk,35,tr) in your Asterisk extensions.conf to call SIP extension 1000 on your Lync box.
Some troubleshooting tips
- First troubleshooting step is to wait 15-30 minutes. It may take some time for the topology changes to propogate.
- Sign out and then back into Lync.
- Do a hard restart of Asterisk with the /etc/init.d/asterisk restart command. This will force a reload of the configuration.
- Re-read step 7 and ensure you did publish the topology changes, then wait 15 minutes.
- If you have any firewall enabled on your Lync or Asterisk box take it down until you get things working. If you require a firewall after all is working, then you need to enable the following port exclusions.
Port 5060 TCP/UDP should be open on your Asterisk box.
Ports 10000-20000 should be open for RTP traffic on the Asterisk box.
Port 5068 TCP/UDP should be open on your Lync box.
Thursday, 24 November 2011
Compiling app_swift for AsteriskNOW or Fedora
For those building Asterisk interactive voice menus the app_swift plugin is a must. Giving the administrator the ability to directly interface with Cepstral voices from within the dial plans is a massive time saver.
The problem
Unfortunately many users are having issues with compiling the app_swift module on AsteriskNOW as the appropriate build tools are not included in the operating system.
If you don't have the correct tools installed you will probably see an output like this.
/usr/include/string.h:66: error: declaration for parameter âmemchrâ but no such parameter
/usr/include/string.h:62: error: declaration for parameter âmemcmpâ but no such parameter
/usr/include/string.h:59: error: declaration for parameter âmemsetâ but no such parameter
/usr/include/string.h:51: error: declaration for parameter âmemccpyâ but no such parameter
/usr/include/string.h:43: error: declaration for parameter âmemmoveâ but no such parameter
/usr/include/string.h:38: error: declaration for parameter âmemcpyâ but no such parameter
/usr/lib/gcc/i486-linux-gnu/4.3.2/include/stddef.h:214: error: declaration for parameter âsize_tâ
app_swift.c:569: error: expected â{â at end of input
make: *** [app_swift.o] Error 1
The result is no app_swift.o module and a frustrated administrator.
Installing app_swift
The following instructions will work with Asterisk 1.6.x on AsteriskNOW or Fedora distributions.
1. Before you install app_swift you need to download and build the Cepstral swift package. Start by downloading the Allison voice package, alternatively you can choose a voice you prefer from Cepstral.com.
wget http://downloads.cepstral.com/cepstral/i386-linux/Cepstral_Allison-8kHz_i386-linux_5.1.0.tar.gz
2. Extract the package .
tar -zxvf Cepstral*
3. Enter the directory.
cd Cepstral_Allison-8kHz_i386-linux_5.1.0
4. Run the installer.
./install.sh
5. Load the library into ld.
echo /opt/swift/lib > /etc/ld.so.conf.d/cepstral.conf
6. Now run ldconfig to finish the ld configuration process.
ldconfig
7. Its time to get app_swift compiled, first start by downloading the source.
wget http://pbxinaflash.net/source/app_swift/app_swift-1.6.2.tar.gz
8. Before we can compile swift, the appropriate build tools and libraries must be installed into the OS. Issue the following commands sequentially to install the tools with yum.
yum install gcc
yum install build-essential
yum install asterisk-devel
yum install kernel-devel
yum groupinstall "Development Tools"
9. Extract app_swift in preparation of compiling.
tar -zxvf app_swift-1.6*
10. Go into the app_swift directory.
cd app_swift-1.6.2
11. Now we can make the package.
make ; make install
12. Copy the configuration file to the asterisk directory.
cp swift.conf.sample /etc/asterisk/swift.conf
13. We also need to make a symbolic link to the swift binary for easier access.
14. Finally you need to edit swift.conf to reflect the voice you have installed. I always choose Allison, but the choice is yours.
sed -i 's|David-8kHz|Allison-8kHz|' /etc/asterisk/swift.conf
15. We finish with restarting Asterisk
/etc/init.d/asterisk restart
Confirming all is well
Once the installation is complete the module should be loaded into Asterisk. You can check this by starting asterisk console and issuing the show application command.
asterisk*CLI> core show application swift
-= Info about application 'Swift' =-
You can now start swift()'ing your way to a flexible, intuitive and interactive dial plan that suites your requirements.
The problem
Unfortunately many users are having issues with compiling the app_swift module on AsteriskNOW as the appropriate build tools are not included in the operating system.
If you don't have the correct tools installed you will probably see an output like this.
/usr/include/string.h:66: error: declaration for parameter âmemchrâ but no such parameter
/usr/include/string.h:62: error: declaration for parameter âmemcmpâ but no such parameter
/usr/include/string.h:59: error: declaration for parameter âmemsetâ but no such parameter
/usr/include/string.h:51: error: declaration for parameter âmemccpyâ but no such parameter
/usr/include/string.h:43: error: declaration for parameter âmemmoveâ but no such parameter
/usr/include/string.h:38: error: declaration for parameter âmemcpyâ but no such parameter
/usr/lib/gcc/i486-linux-gnu/4.3.2/include/stddef.h:214: error: declaration for parameter âsize_tâ
app_swift.c:569: error: expected â{â at end of input
make: *** [app_swift.o] Error 1
The result is no app_swift.o module and a frustrated administrator.
Installing app_swift
The following instructions will work with Asterisk 1.6.x on AsteriskNOW or Fedora distributions.
1. Before you install app_swift you need to download and build the Cepstral swift package. Start by downloading the Allison voice package, alternatively you can choose a voice you prefer from Cepstral.com.
wget http://downloads.cepstral.com/cepstral/i386-linux/Cepstral_Allison-8kHz_i386-linux_5.1.0.tar.gz
2. Extract the package .
tar -zxvf Cepstral*
3. Enter the directory.
cd Cepstral_Allison-8kHz_i386-linux_5.1.0
4. Run the installer.
./install.sh
5. Load the library into ld.
echo /opt/swift/lib > /etc/ld.so.conf.d/cepstral.conf
6. Now run ldconfig to finish the ld configuration process.
ldconfig
7. Its time to get app_swift compiled, first start by downloading the source.
wget http://pbxinaflash.net/source/app_swift/app_swift-1.6.2.tar.gz
8. Before we can compile swift, the appropriate build tools and libraries must be installed into the OS. Issue the following commands sequentially to install the tools with yum.
yum install gcc
yum install build-essential
yum install asterisk-devel
yum install kernel-devel
yum groupinstall "Development Tools"
9. Extract app_swift in preparation of compiling.
tar -zxvf app_swift-1.6*
10. Go into the app_swift directory.
cd app_swift-1.6.2
11. Now we can make the package.
make ; make install
12. Copy the configuration file to the asterisk directory.
cp swift.conf.sample /etc/asterisk/swift.conf
13. We also need to make a symbolic link to the swift binary for easier access.
14. Finally you need to edit swift.conf to reflect the voice you have installed. I always choose Allison, but the choice is yours.
sed -i 's|David-8kHz|Allison-8kHz|' /etc/asterisk/swift.conf
15. We finish with restarting Asterisk
/etc/init.d/asterisk restart
Confirming all is well
Once the installation is complete the module should be loaded into Asterisk. You can check this by starting asterisk console and issuing the show application command.
1. asterisk -crIf everything is running smoothly you should see an output similar to below.
2. core show application swift
asterisk*CLI> core show application swift
-= Info about application 'Swift' =-
You can now start swift()'ing your way to a flexible, intuitive and interactive dial plan that suites your requirements.
Saturday, 19 November 2011
Home automation possibilities using X10 and Asterisk
A couple of years ago I was seriously sick, I knew I was going to be in hospital and then couch bound for several months and decided a home automation project was going to help me get through the tougher times.
After looking at all the automation options, I decided on using the X10 standard. It's affordable, extremely flexible and most importantly I don't need to make any physical modifications to my rental house to implement it. X10 using existing power lines to communicate by using adapters that sit between the power socket and the device to remotely turn devices on and off. Also available among a huge list of optional adapters are light socket adapters that similarly interface between the light socket and the light, providing remote control lighting.
I purchased and quickly implemented a number of X10 power and lighting adapters and a remote to control them. They worked great, but I wanted more. I wanted to control more devices and I wanted to do it remotely, these are all things that X10 does not offer.
X10 is cool, but I need more
Enter Asterisk, the open source, Unix based, PABX solution. I had worked with Asterisk before for several businesses I supported, but only with simple dial plans and voice mail. While Asterisk is designed as a PABX, it has all the required framework to be a great automation conduit. The key features I want to leverage are the support for complex menus, ability to trigger Unix scripts and most importantly the ability accept remote commands via a VOIP dial-in number.
My plan was to setup Asterisk to handle all the triggering of the automation, then if I was at home I could use my portable VOIP phone or off-site I could dial in with my mobile.
The first steps to home automation
The first step is to setup your Linux based PC with the X10 computer interface module, install and setup Asterisk and register your VOIP phone number with the Asterisk box. I have been using VOIP at home for a number of years, so it was easy for me to connect my handset to Asterisk and then let Asterisk connect to my VOIP provider.
What I love most about Linux is the way things so easily connect together with scripting tools such as grep and awk. I set about making a number of scripts that when requested from the Asterisk dial plan, would go about performing my tasks. I was able to automate the following tasks via Asterisk.
What you need to build a similar setup

The beauty of Asterisk is that via the "asterisk -rx" command, you can issue commands directly to Asterisk via the Linux command line. For example you could have a X10 movement sensor setup with the heyu daemon listening to trigger a specific script when any movement is detected. That script could then initiate a dial-plan that calls you and reports there has been movement detected. You could then, via Asterisk and your VOIP number, remotely dial in and trigger your webcam stream to be started which you could view on your mobile phone.
To tie everything together I wrote two sets of scripts that worked in separate ways.
One set of scripts are triggered by Asterisk events. Any time I call Asterisk and speak or dial a command, these scripts are triggered to perform tasks such as turning on a light or reading back the current temperature via text to voice.
The second set of scripts are triggered by events such as time of day, a motion sensor being triggered or an iptables logging event. This second set of scripts then initiate Asterisk commands via "asterisk -rx" or performed other tasks such as turning light on or off.
I took things a step further by creating an Asterisk variable called "house mode". I included lists of settings for modes such as phone, night, day, sleep and do no disturb. Based on the current house mode, speaker volume can be automatically adjusted, asterisk can choose whether to ring the phone or send the call directly to voice mail and lights can be dimmed or toggled.
You can potentially store any variables you want in Asterisk via the database put function, but for reliability it is best to store them somewhere more "permanent". For example I keep the current house mode in a flat file and use that file to populate the database as per the example below.

Some code examples
This is by no means a small project, it requires extensive bash scripting to link everything together. I have included some code examples below that will hopefully give you some ideas and help get you started.
Hopefully you can use some of these ideas to get started but please don't hesitate to contact me for more information.
After looking at all the automation options, I decided on using the X10 standard. It's affordable, extremely flexible and most importantly I don't need to make any physical modifications to my rental house to implement it. X10 using existing power lines to communicate by using adapters that sit between the power socket and the device to remotely turn devices on and off. Also available among a huge list of optional adapters are light socket adapters that similarly interface between the light socket and the light, providing remote control lighting.
I purchased and quickly implemented a number of X10 power and lighting adapters and a remote to control them. They worked great, but I wanted more. I wanted to control more devices and I wanted to do it remotely, these are all things that X10 does not offer.
X10 is cool, but I need more
Enter Asterisk, the open source, Unix based, PABX solution. I had worked with Asterisk before for several businesses I supported, but only with simple dial plans and voice mail. While Asterisk is designed as a PABX, it has all the required framework to be a great automation conduit. The key features I want to leverage are the support for complex menus, ability to trigger Unix scripts and most importantly the ability accept remote commands via a VOIP dial-in number.
My plan was to setup Asterisk to handle all the triggering of the automation, then if I was at home I could use my portable VOIP phone or off-site I could dial in with my mobile.
The first steps to home automation
The first step is to setup your Linux based PC with the X10 computer interface module, install and setup Asterisk and register your VOIP phone number with the Asterisk box. I have been using VOIP at home for a number of years, so it was easy for me to connect my handset to Asterisk and then let Asterisk connect to my VOIP provider.
What I love most about Linux is the way things so easily connect together with scripting tools such as grep and awk. I set about making a number of scripts that when requested from the Asterisk dial plan, would go about performing my tasks. I was able to automate the following tasks via Asterisk.
- Getting a temperature reading from inside my house remotely by using a USB based temperature probe
- Turning on/off lightning and my coffee machine
- Inputting scheduled recordings into my Media Center by the use of a small C++ MCE tool I coded (available here)
- Starting and controlling my air conditioner via the use of a USB infrared transmitter
- Activating a web cam in my house and triggering an iptables port forward of the webcam. I could then view the RTSP feed via my mobile phone.
- Accepting all commands via voice input using the Sphinx speech recognition framework
- Voice based SSH port knocking
- Getting the Asterisk box to tell me my IP address for remote access
- Controlling the current state of my house via external scripting. For example, after 10:30PM, my house would set it self to a sleep state, redirect all incoming VOIP calls to voice mail.
- The ability to schedule wake up calls
- All incoming numbers would be announced over a speaker before the phone rings
What you need to build a similar setup
- A Unix based system - I went with Debian Linux and a MSI Titan 700 Via C7 based system
- Asterisk PABX installed with swift installed if you want text 2 voice
- X10 power/light modules
- X10 to rs232 adapter for PC based control of X10 devices
- A TEMPer USB temperature logger for temperature awareness
- External speakers for announcements
- The Sphinx speech recognition toolkit and sphinx.agi for Asterisk if you want speech recognition
- The Linux heyu X10 control software installed

The beauty of Asterisk is that via the "asterisk -rx" command, you can issue commands directly to Asterisk via the Linux command line. For example you could have a X10 movement sensor setup with the heyu daemon listening to trigger a specific script when any movement is detected. That script could then initiate a dial-plan that calls you and reports there has been movement detected. You could then, via Asterisk and your VOIP number, remotely dial in and trigger your webcam stream to be started which you could view on your mobile phone.
To tie everything together I wrote two sets of scripts that worked in separate ways.
One set of scripts are triggered by Asterisk events. Any time I call Asterisk and speak or dial a command, these scripts are triggered to perform tasks such as turning on a light or reading back the current temperature via text to voice.
The second set of scripts are triggered by events such as time of day, a motion sensor being triggered or an iptables logging event. This second set of scripts then initiate Asterisk commands via "asterisk -rx" or performed other tasks such as turning light on or off.
I took things a step further by creating an Asterisk variable called "house mode". I included lists of settings for modes such as phone, night, day, sleep and do no disturb. Based on the current house mode, speaker volume can be automatically adjusted, asterisk can choose whether to ring the phone or send the call directly to voice mail and lights can be dimmed or toggled.
You can potentially store any variables you want in Asterisk via the database put function, but for reliability it is best to store them somewhere more "permanent". For example I keep the current house mode in a flat file and use that file to populate the database as per the example below.
asterisk -rx "database put x10 housemode `cat /etc/heyu/state/housemode.curr`"

Some code examples
This is by no means a small project, it requires extensive bash scripting to link everything together. I have included some code examples below that will hopefully give you some ideas and help get you started.
- Asterisk Extensions.conf examples - this is where all the magic takes place
- A bash script that Asterisk uses to check current house temperature and announce it
- A bash script that Asterisk uses to make an announcement over the speakers
- A bash script that Asterisk uses to open a port no the firewall, VOIP based port knocking
- A bash script to schedule Asterisk to make a phone call
- A bash script that gets the current IP and converts it to a WAV file, ready for Asterisk to play back
Hopefully you can use some of these ideas to get started but please don't hesitate to contact me for more information.
Wednesday, 16 November 2011
Why virtual desktop admins are going to love VUEM
V.U.E.M. stands for VirtuAll User Environment Manager, a product recently released by VirtuAll Solutions that has the potential to handle delivery of complicated settings to virtual desktops.
It works in a client/server based model. The client is installed onto the virtual desktop and can be hidden from the end user if you require, an application based server is replaced by a simple SQL database that the client connects to directly. This is a perfect solution for most virtualization admin's who will already have access to a MSSQL server and if they are anything like me, they will hate adding new services that require patch management to the network.
Where VUEM really excels is the plethora of different settings that can be deployed with the click of a button, many of which would traditionally require complex and time consuming logon scripts. Via the VUEM console the administrator can deploy a very diverse range of settings including printers, network drives, registry entries, environment variables, file associations and USER DSN database records.

Not only are a large number of settings available for deployment but an equally impressive array of rules and filters can be used to apply the right settings to the right user. I particularly like the XenDesktop and XenApp options that allow me to apply specific settings to specific desktop groups with ease.

Taking things a step further, VUEM has CPU, memory and process management options that enable the administrator to black list applications and protect against CPU/memory spiking. I am particularly looking forward to the "fast logoff" functionality, it is currently only available to XenApp but soon coming to XenDesktop. Fast Logoff does just as its name suggests, instantly disconnects the session when the user clicks log off, allowing another user to immediately log back onto the thin client.

It is also worth mentioning there is no reason VUEM needs to be restricted to virtual desktops, it could potentially replace your vbscript or kixtart based logon scripts. VUEM is still in its infancy, only being released in July 2011, but it is extremely developed for its age. This project is certainly worth a look, so head over to http://www.virtualdesktops.info/ and check it out.
Nostalgia Overclocking: MSI Wind U100 meets LN2
A few years ago Josh Collins (former technical writer for Atomic Magazine) and I had a stupid idea. Take the overclockable MSI Wind U100 netbook, add LN2 and a tub full of insulating grease and see how it overclocks.
After a failed first attempt that instantly killed the Wind, our replacement arrived and a 2nd attempt was more successful. The Wind didn't overclock extremely well, but we still were able to push to what was at the time, the highest Atom frequency recorded.


After an hour or so of fighting with CPU-Z we were able to achieve a frequency of 2315 MHz, a full 715 MHz over the stock frequency.
Here is a link to the Engadget article
Also a link to our forum post at the time, dated 25/11/2008
Pointless? Sure. Waste of resources? For sure. Fun? 100%. I tried to convince Apple to let me do the same thing to a Macbook, they weren't so keen.
Saturday, 5 November 2011
Building a interactive multi touch surface on the cheap using a Wiimote
Interactive projectors are beginning to come a critical part of both education and presentation, I certainly enjoy using them to play out different networking scenarios, draw over network diagrams and give demonstrations. The key drawback to installing this technology is the expensive, interactive whiteboards such as smart or starboards are very expensive and multi touch interfaces are even costlier.
The next step in the interactive whiteboard revolution is the interactive table. Manufactures like Smart Tech are beginning to get into this field more aggressively but the technology is even more expensive than its wall hanging cousin.
The table brings the projector to a new level, you can write as if you were writing on paper and draw images with much more detailed brush strokes. It also has the potential to be more engaging with people sitting closer to the presentation and being more involved.
Thanks to the pioneering work of Johnny Chung Lee we can all have access to this great technology at a fraction of the cost. While it is not as polished as a commercial product, it is very usable and more than suitable for a wide variety of uses.
What you need
The Challenges ahead
The most challenging part of this configuration is making it easy to use for the end user, if its not easy, they won't use it. As I am installing this unit into an area where multiple users want to use it, it must be extremely easy to use.
The main problems that we need to address are:
Problem
How can we ensure the Wiimote stays paired with the PC's bluetooth adapter?
Solution
Thanks to a project called WiiScan, we can make the Wiimote remember the bluetooth connection. In most other Wiimote projects a fresh synchronization is established every time the Wiimote connects to the PC. In this scenario the Wiimote never attempts to connect to the PC, the PC always initiates the connection, this adds an extra configuration step for the end user. WiiScan helps us save the synchronization settings in the Wiimote, so every time you turn on the Wiimote and press 1+2 it will attempt to connect to the PC.
Problem
How does the end user turn on and synchronize the Wiimote without misaligning it?
Solution
If the user has to touch the Wiimote no matter how careful they are, eventually it will misalign. I am going to run an extension lead to the Wii's power input via an on/off switch. This will let me connect an AC adapter to power the Wii and allow the user to turn it on and off without ever touching the Wii itself. Furthermore I am going to "jam" on the 1+2 buttons, so as soon as the Wii is turned on, it initiates a synchronization with the PC.
Problem
How does the end user connect the Wii to the PC with minimum interaction or technical skill?
Solution
The multi-touch interfaces relies on a piece of software called WiiTUiO. WiiTUiO works extremely well but requires the user to first launch it, then tick 2 boxes and press connect in the right order. I have chosen to write a simple AutoIt script that will handle the configuration of WiiTUiO.
Hardware Modifications and Setup
Further to the power/sync modifications I decided it was necessary to "jam" on the 1+2 buttons, this means as soon as someone turns the Wiimote on with the remote on/off switch it will try to connect to the PC.
The Pens
I have built my own infra-red pens, which is really simple to do. You can buy a infra-red LED from your favourite electronics store (the more powerful, the better), some wire, a AA battery and a click switch and then fit them into a pen or highlighter. The pen builds are out of the scope of this tutorial, but there are lots of great tutorials explaining how to do it.


Further Modifications
Boon Jin has some great tutorials on adding extensions to both the power and red sync button.
Included are some pictures of my further modifications.


Software Setup
1. Boot your system, copy WiiTUiO, MultiTouchVista (works with Windows 7) and WiiScan onto your computer. Ensure you have a bluetooth adapter installed.
2. Our first task is to installed the MultiTouchVista driver and configure it. MultiTouchVista is the driver that takes our Wiimote from a humble single touch device into a multi touch monster. Under the "multitouchvista" folder, navigate to "Driver" and then "x32" for 32bit or "x64" for 64bit.
3. Run the "Install driver.cmd" to install the base driver.
4. Once the installation is complete. Open "Device Manager", navigate to "Human Interface Devices" and select "Universal Software HID device". Right click "Universal Software HID device" and select "Disable", then immediately "Enable" it again.
Disabling and re-enabling this driver triggers the appropriate services to restart and lets us move onto step 5. If you fail to disable/re-enable it, the following steps will fail.

5. Next we need to configure MultiTouchVista to use the TUIO protocol. To do this navigate to the "multitouchvista" folder and start the "multitouch.service.console.exe", leave it running and also launch "multitouch.configuration.WPF.exe".
6. The default configuration will be "MultipleMice". Select the "Tuio" option from the Available Devices list, then click the blue arrow. At this point "Tuio" should be listed under "Active Device", click "Restart Service". You can now close both windows.

7. Next we need to use WiiScan to create a semi-permanent connection between the Wiimote and the PC. Before we proceed, if you have already connected your Wii to the PC, go into the bluetooth devices list and delete the Wiimote or the next step will fail.
8. Open Wiiscan by launching "wiiscantray.exe". Next promptly press the red synchronization button on your Wiimote and select "Register Wiimote" from WiiScan.
After waiting for about a minute, the confirmation box should appear saying the connection was successful. If it does not, please repeat the process a few times until it pairs successfully.

9. The hard work is done, the Multi Touch driver is configured and the Wiimote has a semi-permanent pair with the PC. Now we need to launch the WiiTUiO software to process the multi touch events.
Launch WinTUiO and tick both "TUIO Multi Touch Evnets" and "Win 7 Multi Touch Events" then press "Connect". If it reports the connection has failed, press the 1+2 buttons on your Wiimote to ensure it is connected to the PC and then try pressing "Connect" again.

10. The last step in the process is to hit "Calibrate" and go through the calibration process. At this point you can also adjust your Wiimote to get the best coverage of your touch area.
Making life easy for the end user
As I mentioned earlier I am planning to put this multi touch table in a heavily used area where different users will be using it all the time. To make things easier I have written a very simple AutoIt script. I don't claim for a minute to have any scripting skills so I am sure this can be cleaned up nicely.
Click here to download the script
Please ensure you put WiiTUiO in a folder called c:\wiimote, also put beyond logic's process.exe in the folder. For this to work perfectly you should also apply the following registry edit, this edit ensures the WiiTUiO icon doesn't get hidden in the systray, which is something my dodgy script relies on!

The process for the end user is extremely simple:
1. Click on the compiled WiiSync script.
2. The WiiSync script asks you to flick the "on/off" switch and then press "OK".
3. The WiiSync script briefly disables keyboard/mouse input and sets up WiiTUiO.
4. The user is then informed they can begin using the touch interface.
The Cost
The biggest cost is obviously a projector if you don't already have one, but an old projector that is too weak for other areas will work perfectly.
The other costs for my project are:
Build cost of pens - $10
Wiimote - $50
Bluetooth Adapter - $5
Remote on/off switch - $7
Materials for future mount - $30
Total - $92
Troubleshooting
I found with certain bluetooth adapters I simply couldn't get the connection to be consistent. On the HP laptop I was initially using, the built-in bluetooth adapter would only give me 1 minute of connectivity before I had to repeat the pairing process. I tried a number of different bluetooth stacks, driver versions and configurations, none of which worked.
As soon as I changed to a $5 bluetooth adapter from ebay, things worked perfectly. If you are having issues with pairing you will need to experiment with different bluetooth stacks (bluesoleil seems to be the stack of choice for most people), change the adapter or both.
Some users also reported issues installing VistaMultiTouch if they had previously uninstalled it. This is due to the windows service that VistaMultiTouch leaves behind, your should be able to resolve that problem by opening a command prompt and typing:
sc delete unisofthid
Then try the driver installation again.
In Action
Here are a few pictures and a youtube video of my set-up in actio. The Windows 7 Multi Touch Pack is a great way to show off this technology, Microsoft Onenote and even Paint also work great.


The next step in the interactive whiteboard revolution is the interactive table. Manufactures like Smart Tech are beginning to get into this field more aggressively but the technology is even more expensive than its wall hanging cousin.
The table brings the projector to a new level, you can write as if you were writing on paper and draw images with much more detailed brush strokes. It also has the potential to be more engaging with people sitting closer to the presentation and being more involved.
Thanks to the pioneering work of Johnny Chung Lee we can all have access to this great technology at a fraction of the cost. While it is not as polished as a commercial product, it is very usable and more than suitable for a wide variety of uses.
What you need
- A Windows 7 system (preferably 32bit) with bluetooth adapter.
- A projector - I am using an old, end of life projector
- Some form of mount for the projector.
- A Wiimote.
- Software: MultiTouchVista - WiiTUiO - WiiScan
- An infrared pen, you can buy one from a site such as infraredpens.com or build your own.
- Optional: A remote on/off switch and AC power modification to the Wiimote
- Optional: my WiiSync script to automate the launching process
The Challenges ahead
The most challenging part of this configuration is making it easy to use for the end user, if its not easy, they won't use it. As I am installing this unit into an area where multiple users want to use it, it must be extremely easy to use.
The main problems that we need to address are:
Problem
How can we ensure the Wiimote stays paired with the PC's bluetooth adapter?
Solution
Thanks to a project called WiiScan, we can make the Wiimote remember the bluetooth connection. In most other Wiimote projects a fresh synchronization is established every time the Wiimote connects to the PC. In this scenario the Wiimote never attempts to connect to the PC, the PC always initiates the connection, this adds an extra configuration step for the end user. WiiScan helps us save the synchronization settings in the Wiimote, so every time you turn on the Wiimote and press 1+2 it will attempt to connect to the PC.
Problem
How does the end user turn on and synchronize the Wiimote without misaligning it?
Solution
If the user has to touch the Wiimote no matter how careful they are, eventually it will misalign. I am going to run an extension lead to the Wii's power input via an on/off switch. This will let me connect an AC adapter to power the Wii and allow the user to turn it on and off without ever touching the Wii itself. Furthermore I am going to "jam" on the 1+2 buttons, so as soon as the Wii is turned on, it initiates a synchronization with the PC.
Problem
How does the end user connect the Wii to the PC with minimum interaction or technical skill?
Solution
The multi-touch interfaces relies on a piece of software called WiiTUiO. WiiTUiO works extremely well but requires the user to first launch it, then tick 2 boxes and press connect in the right order. I have chosen to write a simple AutoIt script that will handle the configuration of WiiTUiO.
Hardware Modifications and Setup
Further to the power/sync modifications I decided it was necessary to "jam" on the 1+2 buttons, this means as soon as someone turns the Wiimote on with the remote on/off switch it will try to connect to the PC.
The Pens
I have built my own infra-red pens, which is really simple to do. You can buy a infra-red LED from your favourite electronics store (the more powerful, the better), some wire, a AA battery and a click switch and then fit them into a pen or highlighter. The pen builds are out of the scope of this tutorial, but there are lots of great tutorials explaining how to do it.


Further Modifications
Boon Jin has some great tutorials on adding extensions to both the power and red sync button.
Included are some pictures of my further modifications.

Battery lead extension for AC power and switch

Solder points for remote sync button

Remote On/Off and Sync switch

Software Setup
1. Boot your system, copy WiiTUiO, MultiTouchVista (works with Windows 7) and WiiScan onto your computer. Ensure you have a bluetooth adapter installed.
2. Our first task is to installed the MultiTouchVista driver and configure it. MultiTouchVista is the driver that takes our Wiimote from a humble single touch device into a multi touch monster. Under the "multitouchvista" folder, navigate to "Driver" and then "x32" for 32bit or "x64" for 64bit.
3. Run the "Install driver.cmd" to install the base driver.
4. Once the installation is complete. Open "Device Manager", navigate to "Human Interface Devices" and select "Universal Software HID device". Right click "Universal Software HID device" and select "Disable", then immediately "Enable" it again.
Disabling and re-enabling this driver triggers the appropriate services to restart and lets us move onto step 5. If you fail to disable/re-enable it, the following steps will fail.

5. Next we need to configure MultiTouchVista to use the TUIO protocol. To do this navigate to the "multitouchvista" folder and start the "multitouch.service.console.exe", leave it running and also launch "multitouch.configuration.WPF.exe".
6. The default configuration will be "MultipleMice". Select the "Tuio" option from the Available Devices list, then click the blue arrow. At this point "Tuio" should be listed under "Active Device", click "Restart Service". You can now close both windows.

7. Next we need to use WiiScan to create a semi-permanent connection between the Wiimote and the PC. Before we proceed, if you have already connected your Wii to the PC, go into the bluetooth devices list and delete the Wiimote or the next step will fail.
8. Open Wiiscan by launching "wiiscantray.exe". Next promptly press the red synchronization button on your Wiimote and select "Register Wiimote" from WiiScan.
After waiting for about a minute, the confirmation box should appear saying the connection was successful. If it does not, please repeat the process a few times until it pairs successfully.

9. The hard work is done, the Multi Touch driver is configured and the Wiimote has a semi-permanent pair with the PC. Now we need to launch the WiiTUiO software to process the multi touch events.
Launch WinTUiO and tick both "TUIO Multi Touch Evnets" and "Win 7 Multi Touch Events" then press "Connect". If it reports the connection has failed, press the 1+2 buttons on your Wiimote to ensure it is connected to the PC and then try pressing "Connect" again.

10. The last step in the process is to hit "Calibrate" and go through the calibration process. At this point you can also adjust your Wiimote to get the best coverage of your touch area.
Making life easy for the end user
As I mentioned earlier I am planning to put this multi touch table in a heavily used area where different users will be using it all the time. To make things easier I have written a very simple AutoIt script. I don't claim for a minute to have any scripting skills so I am sure this can be cleaned up nicely.
Click here to download the script
Please ensure you put WiiTUiO in a folder called c:\wiimote, also put beyond logic's process.exe in the folder. For this to work perfectly you should also apply the following registry edit, this edit ensures the WiiTUiO icon doesn't get hidden in the systray, which is something my dodgy script relies on!
reg add HKLM\SOFTWARE\Microsoft\Windows\CurrentVersion\Explorer /v EnableAutoTray -t REG_DWORD /d 0 /f
The process for the end user is extremely simple:
1. Click on the compiled WiiSync script.
2. The WiiSync script asks you to flick the "on/off" switch and then press "OK".
3. The WiiSync script briefly disables keyboard/mouse input and sets up WiiTUiO.
4. The user is then informed they can begin using the touch interface.
The Cost
The biggest cost is obviously a projector if you don't already have one, but an old projector that is too weak for other areas will work perfectly.
The other costs for my project are:
Build cost of pens - $10
Wiimote - $50
Bluetooth Adapter - $5
Remote on/off switch - $7
Materials for future mount - $30
Total - $92
Troubleshooting
I found with certain bluetooth adapters I simply couldn't get the connection to be consistent. On the HP laptop I was initially using, the built-in bluetooth adapter would only give me 1 minute of connectivity before I had to repeat the pairing process. I tried a number of different bluetooth stacks, driver versions and configurations, none of which worked.
As soon as I changed to a $5 bluetooth adapter from ebay, things worked perfectly. If you are having issues with pairing you will need to experiment with different bluetooth stacks (bluesoleil seems to be the stack of choice for most people), change the adapter or both.
Some users also reported issues installing VistaMultiTouch if they had previously uninstalled it. This is due to the windows service that VistaMultiTouch leaves behind, your should be able to resolve that problem by opening a command prompt and typing:
sc delete unisofthid
Then try the driver installation again.
In Action
Here are a few pictures and a youtube video of my set-up in actio. The Windows 7 Multi Touch Pack is a great way to show off this technology, Microsoft Onenote and even Paint also work great.


Subscribe to:
Posts (Atom)